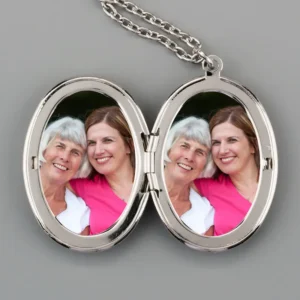
A locket necklace is a unique piece of jewellery that people hold close to their hearts. It’s such a timeless and classic piece of jewellery. A necklace with pictures inside is particularly special because it holds small sentimental photos of loved ones close to your heart.
Our customer services team love jewellery and spent hours testing and comparing a range of gold lockets and silver lockets to give you our best recommendations. Whether you prefer a heart shaped locket, an oval locket or a round locket these top-rated lockets with photos have our seal of approval.
So, if you’re buying a locket for a wife, girlfriend or child we think we’ve found the best examples available online today.
We scored each locket out of 100 based upon quality, design, value for money, uniqueness and ease of purchase online.
We’ve updated our post for 2023 so if you are looking for the perfect locket for a Christmas gift this year read on…
-
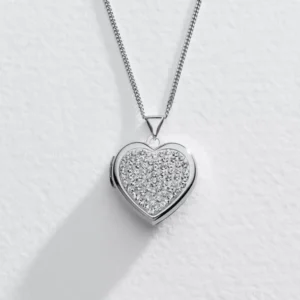
Heart Locket With Diamond
Posh Totty
£115.00
Score: 91/100
Brand – Posh Totty
Locket measurements – 18×18 mm
Colour – Silver
Metal – Gold plated, sterling silver, 18 Carat
Length of necklace – from 455 mm (18 inches) to 762 mm (30 inches) chain
Stones – One birthstone
Pendant photo size and shape – 16×16 mm, heart shapedThis is a great quality necklace which is handmade in the UK. It is the most expensive of the picture lockets we reviewed but it’s made extra special because it has a sparkling diamond set in an engraved starburst on the front and can be engraved on the back.
This heart shaped locket holds 2 photos and is made from sterling silver with 18ct yellow or rose gold plating.
The choice of chain lengths is a great advantage compared to other lockets reviewed.
You can buy cheaper lockets from this Posh Totty but we felt the uniqueness, size and quality of this locket justifies its price and it makes the perfect birthday or Christmas gift for someone really special.
In summary this is an absolutely gorgeous and stunning personalised locket!
-
Wanderlust + Co Heart Locket Pendant Necklace, Gold
John Lewis
£31.20
Score: 86/100
Brand – Wanderlust + co
Locket measurements – 5×19 mm
Colour – Gold
Metal – Gold plated brass, 14 Carat
Length of necklace – 455 mm (18 inches) chain
Stones – One Cubic Zircona stone
Pendant photo size and shape – 5×17 mm, heart shapedHeart shaped locket pendants don’t come more daintier and pretty than this. This gold locket features a delicate star engraving on the front and opens to reveal a heartfelt inscription on the inside.
We couldn’t believe the quality for such a reasonable price.
If you are looking for a good quality, delicate looking necklace with that all important sparkle this is the one for you. What’s more although the pendant is small it is beautifully packaged and is one of our top recommended lockets for a lady.
-
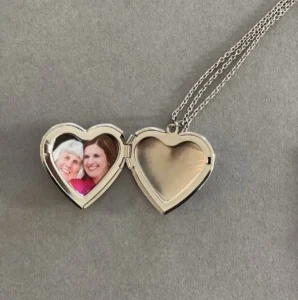
Sterling Silver Heart Locket
Goldsmiths
£50.00
Score 84/100
Brand – Goldsmiths
Locket measurements – 17×24 mm
Colour – Silver
Metal – Sterling Silver
Length of necklace – 450 mm (18 inches) chain
Stones – None
Pendant photo size and shape – 15×22 mm, heart shapedThis sterling silver locket pendant is a minimalistic piece of jewellery and combines with all outfits to add an elegant touch. Open the clasp and this locket displays two good sized locket pictures.
We also felt that the simple design makes this the ideal locket for men.
Although we liked the simplicity and refinement of this heart shaped locket, we did feel it was let down by the price which was higher than many of the others
-
Radley Love Letters Silver Tone Heart Locket Necklace
H Samuel
£29.95
Score 82/100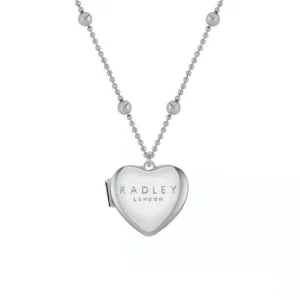
Brand – Radley
Locket measurements – 5×19 mm
Colour – Silver
Metal – Brass
Length of necklace – 550 mm (22 inches) chain
Stones – None
Pendant photo size and shape – 5×17 mm, heart shapedWe recommend this cute silver locket necklace for all ages. The Radley logo adds a premium touch and the unusual chain design, albeit a little thin adds a unique touch. This is a pretty piece of jewellery which catches the eye.
The craftsmanship is good for the price but as it is a small heart shaped locket it may be tricky to find a suitable photo to fit such a small area.
The picture locket is reasonably priced and H Samuel’s shopping experience in store (Bournemouth) was very good.
-
Moon & Back Silver Heart Photo Locket Pendant Necklace
Argos
£29.99
Score 80/100
Brand – Moon & Back
Locket measurements – 18×18 mm
Colour – Silver
Metal – Sterling Silver
Length of necklace – 457 mm (18 inches) chain
Stones – 70 Cubic Zircona stonesPendant photo size and shape – 16×16 mm, heart shaped
Made of sterling silver this heart shaped silver locket has an array of tiny crystals on the front and has room for two photos on the inside.
On the positive side this pendant is a good size, very sparkly and we felt it makes a great necklace for a teenager. However, it is a little flimsy looking and let down by the packaging as it’s a shame it didn’t come in a presentation box like some of the others we reviewed.
The Argos online shopping experience was great with easy product search, fast checkout and speedy delivery.
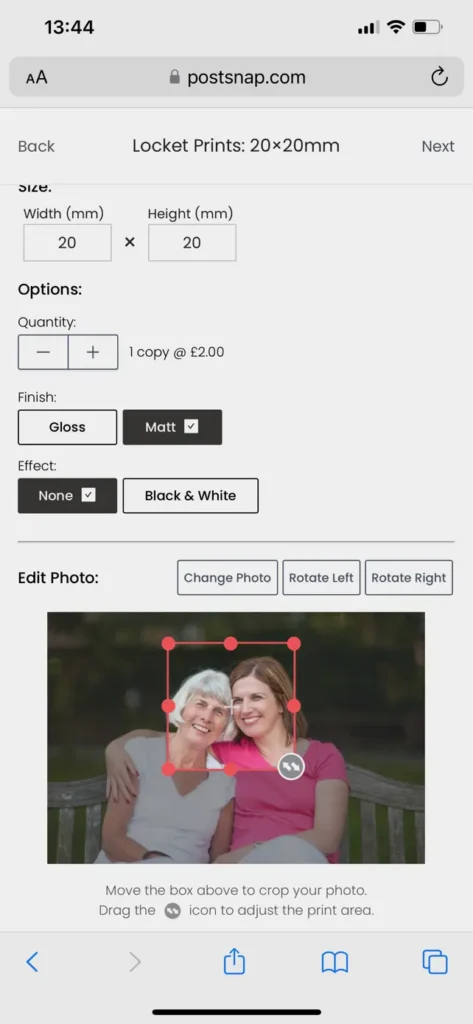
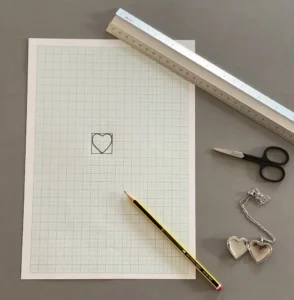
Print photos for locket necklaces
Once you’ve purchased your picture locket, you’ll need to print tiny photos to fit. This is where PostSnap comes in. Upload your photos to our online photo printing website and we will print tiny photos at any dimensions you need – order locket photo prints online here.

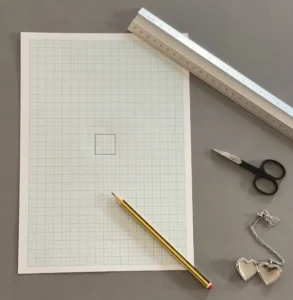
We also have some great advice on how to print photos for a locket and how to put a photo in your locket here.


More information about locket necklaces
Lockets a classic piece of jewellery and with thoughtfully chosen photos inside make an ideal, meaningful gift for birthdays, anniversaries, or Christmas. There are lockets on the market to suit all styles and tastes and they can we worn with just about anything.


The most important thing to consider here is who the locket is for. If you’re buying it for yourself then you will obviously choose something in line with your own personal taste. However, if you’re buying such a sentimental gift for someone else you want it to be something they will wear and treasure, that suits their style and will still look classy in years to come. It’s not a bad idea to ask them what metal they prefer their jewellery to be, or if you’re subtle, you could take note of the style of jewellery they already wear and find something that would compliment that. Do they favour classic shapes and colours? Or something a little bit different? Once you’ve determined this you’re better equipped to choose whether you want a gold or silver locket, a traditional oval or heart shaped locket design, or something more modern.
The next important consideration are the locket photos you choose because when you open your picture locket you’ll be reminded of memorable people and moments and you’ll carry these memories next to your heart. Therefore, the photo you choose to go inside it will hold special memories and meaning. Take your time to choose the perfect image — enjoy the process of browsing old photos and reliving those memorable moments. Alternatively, you could also consider putting a lock of hair in your locker rather than photos.
Finally, don’t forget that you can also get beautiful lockets that are personalised with an inscription – like ‘we love you Mum’ in a child’s handwriting and this along with a special photo makes a locket necklace a very special gift.
All lockets featured in this article were independently selected and reviewed by our customer service team. We do not earn affiliate revenue or commission if you buy something.