Home Author
Author

PostSnap Team

using photos for scrapbooking

It’s true what they say – the days really are long and the years really are short when you’re in the throes of parenthood. It might feel like your little people will always be, well, little, but before you know it they’ll be (almost) fully grown. And this is where scrapbooking comes in…

The explosion of camera phones has shown us how much we all value capturing these precious memories as they fly by. Getting them off our phones and into our hands however doesn’t happen as frequently as it should. Modern family scrapbooks are a really lovely way to preserve your photo memories and combine a journaling element. Scrapbooking can be elegant, minimalistic and classic, or maximalist and full of colour. The joy of a scrapbook type photo album is that it can be 100% personalised – you get total creative control. And when it comes to scrapbooking pictures to print, here at PostSnap we’ve got some great options, from our 2×2 minis  and square prints , to our retro prints which can include text.

Scrapbooking Ideas

Below, we’ve gathered together our top tips and ideas for how to make three different types of scrapbooks using family photos. You’ll also find journaling and photo prompts to help you on your way. We hope this inspires you to print milestone photos for a scrapbook and create beautiful mementos your children will cherish.

Here’s what you’ll need:

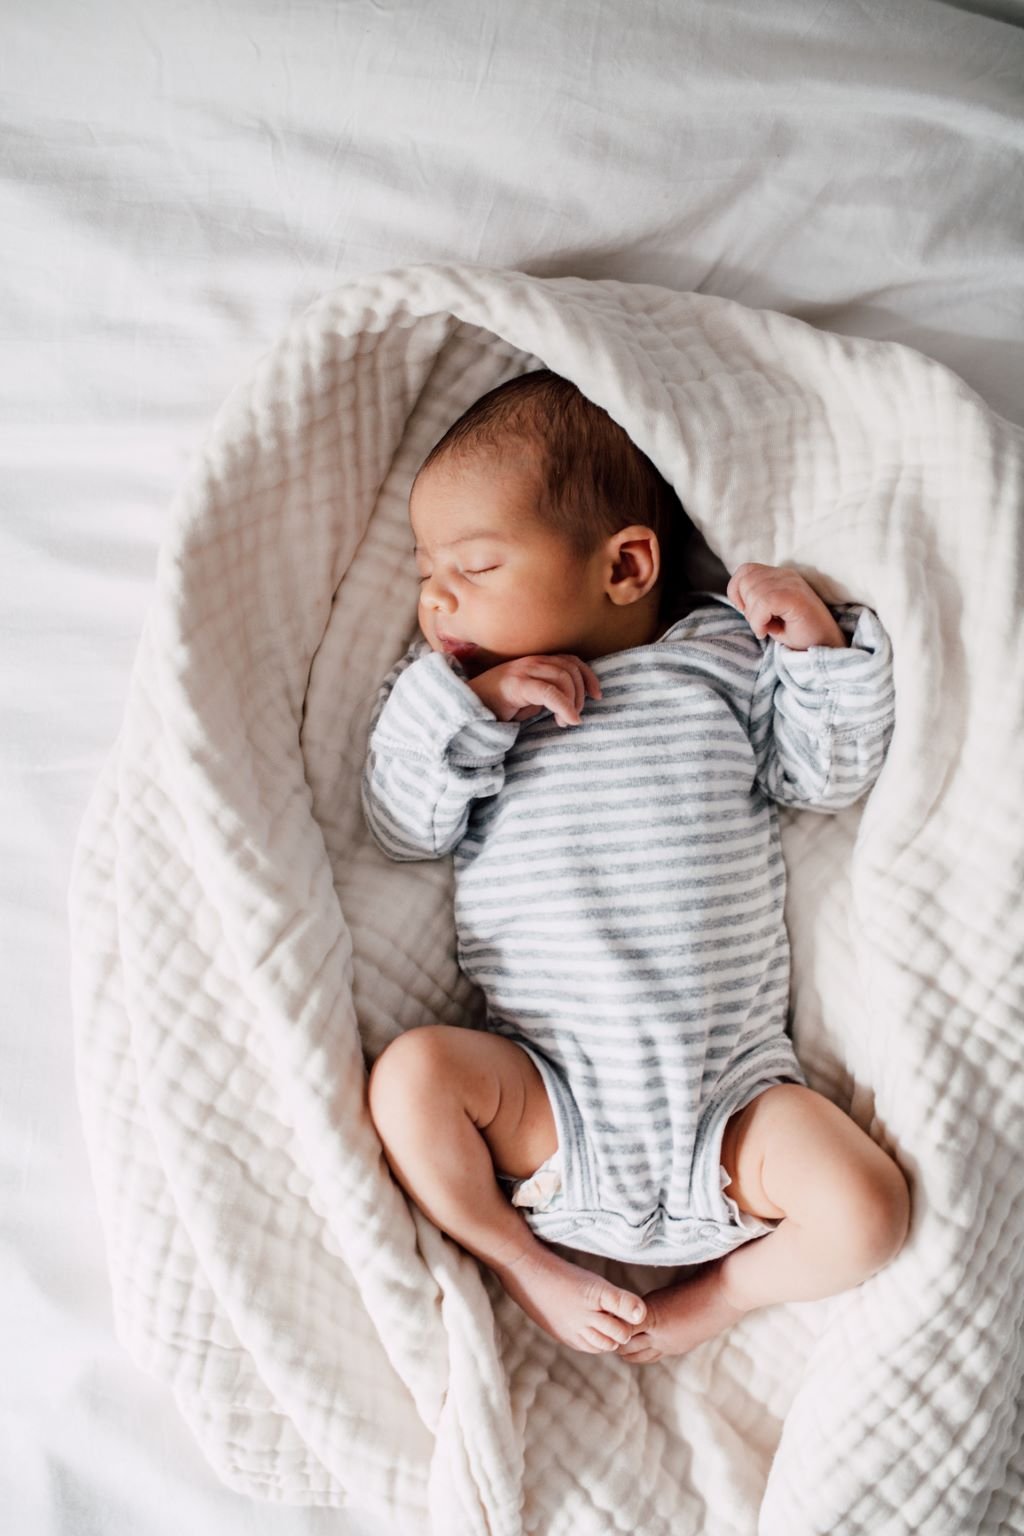
1. A Scrapbook for Baby’s First Year

So much happens in a baby’s first year of life. They grow from a snoozing, sleeping little bundle, to rolling over and sitting up, to chit-chatting away, crawling and even walking. It’s a year packed full of hitting development milestones and experiencing everything for the first time. They’ll never be this little again, which is as good an excuse as any to document the big, and small moments throughout the year in a photo scrapbook. Be sure to add memorable quotes to your scrapbook of photos – first smile! breakfast time! first tooth! bath time!

Top tips:
– Firstly, start your book with all the best bits – baby’s birthdate, how much they weighed and the reasons you chose their name. Don’t forget to include your birth announcement picture and some of the ‘first day’ snaps of your little bundle. Our retro prints would be great for scrapbooking here.
– Secondly, it’s all about remembering to capture a few cute shots on the same day, every month – set a reminder on your phone so you don’t forget.
– Keep a running note in your phone of everything that baby gets up to that month, whether it’s first tastes or first steps, and then take the scrapbook pictures to match. That way when you get to writing your monthly summary everything is already ready to go.
– Finally, don’t forget to do some hand and foot prints to mark your little one’s first month and twelfth month – it’s a really lovely way to see how they’ve grown over the year.

Three journaling prompts:

1. What is Baby’s favourite thing to do this month?
2. What did Baby do that made everyone smile?
3. What was Baby’s favourite bedtime story?

Three photo prompts:

1. First family photo
2. First steps
3. First taste of food

Baby's First Year scrapbook

2. Birthday Scrapbooking – Annual Scrapbooking

At Postsnap we’re all about making memories tangible and we love any excuse to make and record some birthday memories.

An annual Birthday scrapbook, jam packed with all the different iterations of your child over the years is not only a fun memory to look back on, but a cherished collection of ideas, thoughts and funny comments to pass on to your children. All you have to do is think up a set of questions to ask your child every year on their birthday – like a birthday interview. Don’t forget to take birthday photos for your scrapbook and to include snaps from the year gone by – you could make a fun ‘year in review’ collage using our 2×2 mini photo prints.

The magic of this scrapbook album really does lie in the physicality of it – because using your own handwriting, rather than something typed will make this something to be treasured as they get older. And most importantly the photos! Don’t forget the photos. Our photo prints in colour and black and white would add a really stylish look to your scrapbooking here.

Top tips:
– Do keep the basic questions the same, but don’t be afraid to change up the rest every year.
– Leave space to include special souvenirs from the year, such as certificates, ticket stubs or special mementos.
– Try and find photos from across the year to show the breadth of everything your little person has achieved in the twelve months that have just flown by.

Three questions to ask:

1. What do you want to be when you grow up?
2. Favourite song this year?
3. What makes you happy?

Three photo prompts:

1. Holiday pictures from that year’s summer adventures
2. Partaking in their favourite hobby
3. A happy snap with best friends, siblings or nanny and grandpa

scrapbooking using photos

3. Scrapbooking for Budding Photographers

Here’s a fun photo scrapbooking idea: give your little one creative control. Children get a real thrill from taking photos and seeing the world reflected back at them and it’s even better when they can hold the photo prints that they took in their hands. So, why not let your little one have a day of taking pictures on your iPhone or camera (supervised, of course), order some PostSnap photo prints together and when they arrive they can set about creating their very own photo scrapbook.

Top tips:
– You could do this over a couple of weeks or just one day out. Either way, they’ll LOVE having their own, handmade memory scrapbook.
– Children love an arts and crafts project, so let them go for it and get out the washi tape, stickers, glitter glue and let their inner artist come out to play.
– They may not be old enough to add any journal entries (or maybe they are!) but you could definitely do it for them by asking them questions about what they’ve photographed and recording what they say.

Three journaling prompts:

1. What about this picture makes you happy?
2. Why did you take this one?
3. I love the colours in this. Can you tell me what it is?

Three photo prompts:

1. A selfie!
2. Something you want to keep in your scrapbook forever
3. Something that made you smile


scrapbooking with photos


Photo Credits: Kirsty Mansell (Insta handle: @journalofcuriousthings)

0 comment
1 FacebookTwitterGoogle +Pinterest
Large Photo Prints Framed

Modern technology means we are all capturing memories with professional quality photos to be proud of, but many of those stunning shots stay hidden in your smartphone. Bring them to life and print your photos directly from your phone so you can display them in the perfect photo frame.

MAKING SENCE OF PHOTO PRINT SIZES

Photo prints are one of few things where imperial measurements in inches still prevail, but don’t let that confuse you. It’s easy to convert to metric sizes if you need to — when choosing the right photo frame size for example.

Large portrait or landscape print sizes

8×6 inches = 20.3×15.2cm (Landscape)
6×8 inches = 20.3×15.2cm (Portrait)
10×8 inches = 25.4×20.3cm (Landscape)
8×10 inches = 25.4×20.3cm (Portrait)
12×8 inches = 30.48×20.3cm (Landscape)
8×12 inches = 30.48×20.3cm (Portrait)
A4 = 21×29.7cm (Landscape or portrait)
16×12 inches = 40.64×20.3cm (Landscape)
12×16 inches = 20.3×40.64cm (Portrait)

Large square print sizes

8×8 inches = 20.3×20.3cm
10×10 inches = 25.4×25.4cm
12×12 inches = 30.48×30.48cm
16×16 inches =40.64×40.64cm

It’s worth knowing that large photo prints are trimmed after they’ve been printed. The area which may be trimmed off is around the edge the print and is known as the bleed area. The bleed area typically comprises 2-3mm around the edge of the photo print and it’s advised not to have any important part of the photo within this bleed area as this may be lost in the final trimming.

MATT OR GLOSS FINSH FOR LARGE PHOTO PRINTS?

Whether you choose a matt or gloss finish for your photo prints largely comes down to personal taste, but for a seamless, professional look, there are a few things worth considering before you decide, particularly for large framed photo prints.

Gloss finish

Gloss prints have a shiny finish. This can be a real asset to a colourful, high-resolution photo as it highlights the contrasting tones, adding a rich vibrancy that will make the colours “pop”. Because gloss photo paper has a smooth surface, it gives photos a crisp, sharp, modern finish.

The drawbacks of gloss prints are that they are susceptible to fingerprints and they reflect light. This could attract glare if the print is positioned in a room with lots of light — even more so if the photo is in a glass frame. In addition, gloss photos tend to be tackier and so may stick to the surface of the glass in a frame making it appear like there is a defect in the photo.

Matt finish

A matt surface is generally the professional’s choice. A matt finish scatters rather than reflects light, minimising shine and glare. This makes the prints more versatile — they look good in any amount of light and are easier to view in frames. However, with a matt finish the colour may appear a little duller. Matt photo prints don’t have the same striking depth of colour or sharpened edges that gloss prints do.

The bottom line is that when it comes to big, framed prints with a large surface area, a matt finish probably carries less risk. If you do choose gloss, select a frame with an anti-reflective acrylic panel as these reflect less light and reduce glare.

THE BENEFIT OF A MOUNT

A mount, also known as a mat, is a piece of card that acts as a border around a picture. Just as a well laid-out website has plenty of ‘white space’, the quality, style and viewability of a framed picture is enhanced by mounted photo prints.

As well as looking contemporary and being aesthetically pleasing, a photo mount also serves the more practical purpose of stopping the print from sticking to the glass in a frame, which can happen when the emulsion in the photo reacts to water in the air, or if a framed photo is in direct sunlight.
Before you commit to a frame, check the size of the mount aperture corresponds with the size of your print.

HOW TO FRAME LARGE PHOTO PRINTS

Getting it right when framing your beautiful print can feel daunting, but you can easily achieve a professional look. Here are our photo lab manager’s photo framing tips:Choose the right frame for your large photo prints

To get an initial idea of what sort of frame you want, consider the style and tone of the photo you’re framing and the décor of the house or room you plan to put it in.
Then, unless you’re buying a bespoke frame, start your search with the size of your photo. From there you can weigh up your options when it comes to the frame material (metal, plastic, or wood), colour, width, depth and whether you want a mount.

Black and white photos often benefit from the simplicity of a narrow metal frame, while the vibrancy of a colour photo can be drawn out by choosing a coloured frame to match a prominent colour from the photo itself. Wooden frames can work with traditional photos, or in a home that boasts a rustic or farmhouse style decor.

For great value, stylish frames, The Range, Dunelm and Ikea stock a fabulous selection of landscape, portrait and square photo frames in a variety of photo frame sizes, colours and materials.

Consider the photo itself

One of the most important aspects to consider before framing your print is the impact of the picture frame itself on your photo. The depth of photo frames varies considerably and as your photo will generally sit behind the frame you should ensure that there are no important parts of the photo near the edge as this may be covered by the frame. Similarly, a small part of the photo will sit behind a mount if this option is chosen.

Prepare, adjust, fix

Find a large, flat, clean surface. You’ll also need some tape — framer’s tape, masking tape, washi tape or Sellotape will all do. Before you open the back of the photo frame, make sure the print is ready — minimising the time the cover is open reduces the chance of dust getting onto it. Take out or spin the metal clasps on the back of the frame to release the backing board, then clean the glass or acrylic panel with a microfibre cloth to remove any smudges or dust.

Place the mount on the table face down and lay your print over the aperture, also face down. Use tape the on the back of the print to secure it in place. Hold up your print to check it’s aligned with the frame or mount and adjust it until it’s centred and straight.

Once you’re happy, secure the print onto the frame or mount with longer strips of tape, making sure they’re nice and smooth. Place the mount if used in the frame, drop the backing board on top and fasten the clips.

THE BEST FRAMED PHOTO PRINTS

We all have our favourite photos we want to enlarge and frame but the most popular framed photo prints generally feature wedding photos, travel photos and photos of the children. Framed wedding photos hung on all wall are a timeless classic which adorn almost every family home and have pride of place decade after decade and are passed on from generation to generation.

WHERE TO HANG A LARGE PHOTO FRAME

Extra-large framed photo prints or framed panoramic photo prints look striking as a single showpiece taking centre stage on a wall or as a complimentary group of frames on a landing. But you can also put large prints in a multiple photo frame, or use them to create a gallery wall or photo frame collage, with prints of all your family and friends. You can arrange these in an abstract way or in a more orderly grid. To map out your arrangement, use paper templates.

When deciding where to hang or place your framed photos, be mindful of direct sunlight as this can create glare or cause the print to fade. South facing walls and windowsills may be best avoided.
You can bring your memories to life by enlarging, printing and framing photos directly from your phone. For your own home or as a gift, printed photos always provide that personal, meaningful touch. Order your perfect, high quality photo prints from PostSnap today!

0 comment
1 FacebookTwitterGoogle +Pinterest
Christmas Letter

This year, send personalised Christmas cards with some extra thoughtful touches.

In recent times we’ve all had to get used to seeing less of our loved ones but there’s no doubt that they’ve been in our thoughts. Christmas is a time to reach out and show friends and family we care, and Christmas cards are a brilliant way to do it.

But how can you make sure your Christmas cards are thoughtful, personal and don’t just feel like another chore on your to-do list? Here are our secrets to making Christmas cards mean something, both for you and for those you want to connect with this Christmas.

Personalise your cards with stunning family photos

It’s wonderful to receive any sort of Christmas card, but the ones that really make us feel loved are the cards that are personal and unique.

Personalised Christmas cards with family photos are the perfect window for your loved ones to feel part of your life. Whether you choose a single family photo or a collage of photos to introduce a new addition to the family, send out a big family smile or simply show off your Christmas jumpers, a photo Christmas card means more.

Traditional Christmas cards have a shelf life — people enjoy them in their homes for the festive period but then recycle them or worse, they end up in landfill. However, photo upload cards offer so much more and have longevity because they won’t fade and can be kept and framed, meaning you can reuse your card after the festive season and do your bit for the environment.

It’s super easy to customise and order photo Christmas cards online, choosing single or multiple photos and a template that suits you and your family.

Whether you go for a selection of your favourite photos from throughout the year or capture the moment with a specially taken family photo you can be sure it will mean the world when it smiles out of its envelope.

Personalised Christmas Card With Family Photos

Pop in a personal letter to go with your Christmas card

Family and friends can be spread across the globe. While some may have had a glimpse of your world on social media, they will relish the gift of real insight into what’s been happening in your life.

So, take the time to write a personal Christmas newsletter to give a meaningful update on your year. Not sure where to start? Here are our top tips:

  • Be yourself — it’s you people want to hear from, so be authentic and write in your own voice — imagine you’re talking to them. Write about important events that have happened in your life this year and don’t be afraid to say how you feel about them.
  • Keep your reader in mind — if you’re including your letter in every Christmas card, bear in mind you may need to adjust its content depending on where it’s going. Your work colleague, great aunt, and best friend from university may not all need to hear the same spin.
  • Keep it short and easy to read — we live in a time where people are used to scanning short text on screens. So, a letter will be a particularly thoughtful touch, but keep it to no more than one page and write in short paragraphs. If possible, type it — this makes it easier to read and quicker for you to edit and re-produce.
  • Get the family involved — if your letter is from the whole family, get them all to contribute. Perhaps the kids can write or suggest a paragraph each or simply sign their own names.
  • Try a different format — for a change from the traditional Christmas letter template, why not try a different format? You could write a ‘Top 10’ or a ‘Highlights’ list to sum up your year.
  • Include an anecdote — if you’d rather avoid a list of events, instead focus on a funny story, or tell an interesting tale of something memorable that’s happened in your family’s year.

Christmas Letter

Slip in a mini photo as a thoughtful extra

We take more photos than any generation before us, but so often these visual gems get lost in our digital pockets. Christmas is the ideal time to bring photos to life and give them a real home.

You can print little, fun-sized mini photo prints directly from Instagram and Facebook, and pop them in with your Christmas cards.

Just the right size to slip into a Christmas card, friends and family will also love receiving Polaroid style mini retro prints . Turn a cute photo into a warm piece of nostalgia personalised with a short message and even emoji’s. It will be a great little memento – just perfect for grandma’s purse or displaying on the fridge door.

Photo Insert For Christmas Cards

Write a meaningful message

While a personal letter tucked into your Christmas card goes a long way for family and close friends, your child’s teacher, your boss, or your next-door neighbour may not need the complete family run-down.

But it’s still important to write a thoughtful message that makes those people feel valued. A personalised Christmas card can be an opportunity to say thank you to someone who’s gone that extra mile over the course of the year, who has helped you or has simply been a good friend.

When writing your message, think about who the card is for and what they mean to you — Christmas is a great time to share gratitude, memories, and let people know they’re important to you. If you’re struggling find the words, find a thoughtful quote instead.

For a memorable moment that was caught on camera — that hilarious work-do, your child’s big moment in the school play or old friends getting together.

Start now!

Christmas has a habit of creeping up on us, but it’s no fun rushing around trying to organise things at the last minute. If you really want to give your loved ones the meaningful cards and gifts they deserve (and save yourself a whole lot of pre-Christmas stress) give yourself plenty of time to plan, order and post those festive thoughts.

Feeling inspired? Bring your year to the hearts of your family and friends and give them something memorable and meaningful this Christmas. Order your photo Christmas cards and unique mini photo prints today!


0 comment
1 FacebookTwitterGoogle +Pinterest
Creative wedding photo print ideas

They’ve arrived! One of the best moments after your wedding day is receiving the images back from your photographer. Your wedding is one of the most photographed events in your lifetime, so what to do with all the stunning images? Here we provide all the ideas and inspiration to help you soak up those special moments year after year. From the traditional to the quirky, read on for creative wedding photo print ideas.


7 creative wedding photo print ideas


1. Create a gallery wall

When it comes to wedding photos, you are going to be spoilt for choice! A gallery wall is the perfect way to showcase a selection of your favourites. When selecting which wedding photo prints to display on your gallery wall, we recommend choosing a mix of different shots – the special couple, your guests, some of the finer details like flowers or wedding rings.

What’s so great about this wedding photo print idea is you can choose a layout and frames to suit your home and décor. From matching simple black edged frames in a grid style, to a mismatched look featuring a selection of different frame finishes and sizes.


Wedding photo thank you cards

2. Print wedding photo thank you cards

Wedding photo print ideas which allow you to easily share your favourite images with your nearest and dearest and say thank you all at the same time – winning! With ready-to-go templates, it’s really simple to create thank you cards using your wedding photos. All you need to do is choose your favourite photo and if you are struggling to select just one, simply choose a collage style design.

If your wedding photos are displayed in an online gallery, why not include the link on your thank you cards so your guests can relive the day too!


3. Take over a shelf

You like the idea of displaying multiple photos in the same place, but don’t fancy the faff of putting up a gallery wall? Then try taking over a shelf in your home. A console table or large chest of drawers works brilliantly for this too.

This is one of our teams favourite wedding photo print ideas, because you can use the space to display other wedding keepsakes too, one’s which you wouldn’t be able to hang form the wall. Perhaps some dried flowers from your bouquet or buttonhole, a meaningful card, or some special jewellery.


4. Wedding photo canvas prints

This wedding photo print idea will really add some love to your walls. Give those couple shots the attention they deserve and create stunning wall art for your home. Canvas prints also make a brilliant choice to display large group shots, such as wedding family portraits or wedding party images.


Wedding photo print ideas - photo frames leaning against a wall

5. Lean photos against the wall

Looking for a more casual way to display your wedding photos prints? Try leaning your frames against a wall. For extra-large frames, we recommend placing them directly on the floor. For medium-sized frames, try positioning them on a console table or large chest of drawers. You can play around with layering different sized frames too. The results here are much more relaxed than hanging photos from a wall, an effortless but stylish way to display your wedding photo prints. And the best bit about this wedding photo print idea? It’s so simple to do, no hammering or hanging required!


6. Wedding Photo Garland display

A photo garland makes a super fun and casual way to display your wedding photo prints. You can choose to hang from twine, ribbon or for a really romantic feel, try using string lights.

What’s particularly great about this wedding photo print idea, is that you can you display lots of images, plus you can quickly and easily update the pictures too. This means more of your wedding photos can get the attention they deserve!


Wedding photo prints for wedding photo album

7. Create a wedding photo album

Wedding photography is all about capturing the story of your day and the ultimate way to relive this story is in an album.

Arguably, this is one of the best wedding photo print ideas to remember your special day with others. A family favourite; a real printed album which can be passed around and enjoyed together. The ultimate wedding keepsake.

We hope these creative wedding photo print ideas have inspired you to make more of your wedding photos. Turn your digital wedding photos into real photo prints in a matter of minutes with PostSnap so you can relive your best day ever for years to come..


0 comment
0 FacebookTwitterGoogle +Pinterest
Dog photos: Tips for taking great pet portraits with your iPhone

Pets make some of the cutest (and funniest) photo subjects, but we know that photographing your four-legged friend isn’t always easy! That’s why we’ve put together our top tips for capturing dog photos on your phone.


1. Think about your location

Simple backgrounds work best when capturing photos of dogs. If you’re looking to take pet portraits in the great outdoors then a backdrop of a white sandy beach or green trees will work well.

Remember to pay attention to colour, you want your dog to stand out. For example, a chocolate Labrador will blend into a background of brown tree trunks, you want to choose a backdrop which will provide contrasting colours.


Cute dog photos - young child and her dog

2. Get down to their level

To get the best dog photos, it’s important they feel at ease. So instead of standing over them, take a knee, sit on the floor, lie on your belly, or do whatever you need to get eye-to-eye with your dog.

Not only will this help your pet to feel more comfortable, it will allow you to capture dog photos from their view of the world.


3. Add some props to your dog photos

There’s no doubt about it, props add a real personal touch to your images. If you’re looking to create cute dog photos, try taking a picture of them sitting in your arm chair (if they are allowed on the furniture of course), snuggled up in their bed, or with their favourite soft toy.

Adding a prop, or costume can also be an easy way to capture funny dog photos, so if you are looking for that laugh out loud factor try searching sites such as Pinterest for the best prop and costume ideas. A couple of our favourites, a pair of sunglasses or for that special birthday dog photo, try a party hat.


Funny dog photos

4. Time your dog photos just right

If you are looking to capture more formal-looking pet portraits then choose a time when your dog is a little sleepy. Getting a crisp, sharp shot is much easier when they are a little less active and on-the-go!

Equally, if you want some real action shots to show off their playful nature, then choose the time of day when they get that sudden burst of energy!


5. Getting their attention

The beauty of using your iPhone means you don’t need to have your own eye down a lens, so you can get the dog to engage with you. Or if you have an assistant, even better! Get them to engage with your dog whilst you concentrate on getting the shot!

When it comes to getting their attention, you will know what works best for your dog. From calling their name, making a sound they respond to, using their favourite toy or providing treats. Be sure to keep rewarding your pup between shots!


Dog photos close up

6. Get creative with close ups

For the ultimate cute dog photos, be sure to capture those close-ups. Try getting up close so your dog fills the entire frame, or snap a head shot which shows off their profile.

Feeling extra creative? Get even closer to highlight your favourite part of your dog, from their gorgeous black, wet nose to those small but perfect formed paws! Try experimenting with angles too, front on, from above at 45 degree angles.


7. Think about lighting

Most amateur photographers do best with warm, natural sunlight, so that means shooting in the mornings or evenings, on slightly overcast days, or in the shade if it’s a really sunny day.

If you’re taking photos of dogs indoors, you will want to choose a room which gets lots of natural light. You won’t want to be using a flash as this could startle your pet so opt for the room with the largest window!

Cute photos of dogs

8. Capture dog photos which are full of character

You know your dog best and their funny little quirks and traits are what you love so much – so make sure to capture them.

Perhaps you have a smiling Spaniel or a French Bulldog who will snooze in the strangest positions? Think about what makes your pet so special, and then when the opportunity arises, grab your iPhone and get snapping. Guaranteed to result in some hilarious and rather cute dog photos.


Put all of these tips into action and you’ll have a phone full of gorgeous pet portraits! With PostSnap you can take your pictures from your phone to real photo prints in a matter of minutes, so you can fill your home and albums with your favourite dog photos.

0 comment
0 FacebookTwitterGoogle +Pinterest
School photos

The start of each school term marks yet another milestone in your little one’s childhood. Capturing these memories with our phones has become part of the back-to-school routine, being able to share these special moments with friends and family in photo form. We have put together our favourite ideas, inspiration and tips for capturing these school photos perfectly.


1. Be prepared

We all know how manic a morning routine can be, so it’s important to take some simple steps to ensure you have enough time for your school photoshoot. A lot of this will come from preparation the night before, have the lunchbox packed, the uniform ironed and make sure you have both agreed on the school photos hairstyles! Of course, getting up a little earlier will help too.


School photoshoot - boy sat on school steps

2. Choose your location

Taking back to school photos in front of your front door has become a firm family favourite. A door provides a clean and simple backdrop, you can also try a location in front of a brick wall for a similar, simple yet polished effect.

If you’re looking for something a little bit different try taking your photos at school itself. In front of the school gate, by your child’s peg, on school steps or with their class teacher.


3. Think about props

Adding props to your photoshoot can provide a lovely pop of colour as well as add a personal touch. Need some ideas on the types of props? There are lots of things around the house you can use such an apple, your child’s rucksack or lunchbox, their favourite book or a chalk board.

Props can add a real sense of fun to your images and if your little one suddenly gets camera shy; they make a great distraction. Ask them to interact with the props whilst you snap away!


Back to school photo - brother and sister walking to school

4. How to get candid school photos

If you’re a fan of natural, documentary style portraits, there are some simple ways to create gorgeous candid shots.

Take pictures of them whilst they get ready – brushing their hair, pulling up their socks, doing up their buttons or buckling their shoes. All of these finishing touches make perfect moments for capturing back to school photos.

The journey to school also provides ample opportunities for beautiful photos. Take your phone or camera on your walk to school to capture some great moments, holding their siblings’ hand, the moment they start skipping out ahead, carrying their schoolbag.


5. Get the end of term school photo too!

Our little one’s grow up so much between the first and last day of each school year. Capture school photos on both the first and last day of term so you can compare side by side. We recommend taking these shots in the same location each time, that way you really can see how much they’ve grown!


Secondary school photos

6. Capture school year photos

Taking back to school photos shouldn’t stop with infant school photos, keep the tradition alive all the way through to capturing secondary school photos.

From photos featuring gap toothed smiles, through to those tricky teenage years questioning the choice of hair for school photos! It may require some serious encouragement (and perhaps bribery), but you will both love looking back on your school year photos together for years to come.


7. Make more of your school photos

You’ve completed your photoshoot and your camera role is now full of school photo images – what now? With PostSnap you can take your pictures from your phone to real photo prints in a matter of minutes. Whether it’s prints for a year book album or photos to fill the frames in your home, get school photos online with PostSnap.


0 comment
0 FacebookTwitterGoogle +Pinterest
Baby photos

Welcoming a new baby is a joyous occasion for your family. Those first few weeks, months and years are full of so many precious moments you want to capture for a lifetime. A baby photoshoot is the perfect way to document all those treasured memories for you to enjoy again and again. When it comes to capturing baby photos, you can choose to hire a professional for a baby photoshoot, or you can opt to capture those moments yourself. Here we take you through our top tips for achieving your own baby photoshoot at home.


1. Prepare your baby photo ideas

Before you get started, it’s good to have some shots in mind, so you know the end goal you want to achieve. If you’re not sure about the types of baby photos you are after, no problem, sites such as Pinterest or Instagram are full of baby photo ideas. Try searching for types of photos such as baby photos newborn, baby photos funny or baby photos boys. You can then put together a shortlist of your favourite baby photoshoot ideas.


Newborn baby photos

2. Capture newborn baby photos in the first two weeks

Timing is everything! If you’re looking for images capturing the true newborn stage, with the classic wrinkly newborn skin, then aim for the first two weeks. Babies are typically sleepier at this stage too, so try and time your baby photoshoot around nap time. This will help you to feel more relaxed and with a less wriggly baby it will be easier to capture your baby photos.

After two weeks your baby will be more alert, and so potentially fussy, however if you are looking to get baby photos with more eye contact and capture more of your little one’s personality, then we would suggest waiting until they are a couple of months old.


3. Time the light right

When capturing baby photos at home, you should think about when and where gets the most natural light. A north-facing window lets in indirect sunshine that’s not too harsh or glaring, as long as you have daylight, you can use this location at any time of day. You can get similar results by taking your baby photos at the right time of day, for a west-facing window that’s in the morning or an east-facing window in the afternoon.

If you want to take the shoot outside, time it for golden hour. That is the first hour after sunrise or the last two hours before sunset. These times provide optimum shooting conditions for your baby photos, the light is softer and warmer and shadows are longer.


Baby photo props

4. Use some baby photo props

Adding a few props to your baby photoshoot can give both a professional and personal feel. Need some ideas on the types of props for baby photos? There are lots of things around the house you can use such as a moses basket, a snuggly blanket or swaddle cloth, sheepskin rugs or their favourite cuddly toy.

If you want to inject some colour and fun into your baby photos, how about adding a colourful head band, or seasonal props such as Christmas stockings or a pumpkin. Another option is to find an adorable costume, a quick google search of baby photos boys or baby photos girl will provide plenty of costume inspiration.


5. Safety first

It goes without saying, safety of your newborn always comes first. Here are a few things to consider when undertaking your baby photoshoot at home. Ensure any props are sturdy and well-built. If you’re shooting from above, ensure you use the camera neck strap or a holder if shooting using a phone, just in case the device slips from your hands.

Babies comfort is also key, this will keep both you and baby relaxed and calm to get the most from your baby photoshoot. Ensure to choose props which won’t irritate delicate newborn skin, use a blanket or swaddle layer between baby and any props, just ensure they are washed in unscented detergent. Warm babies are happy babies, keep the room at an optimum temperature.

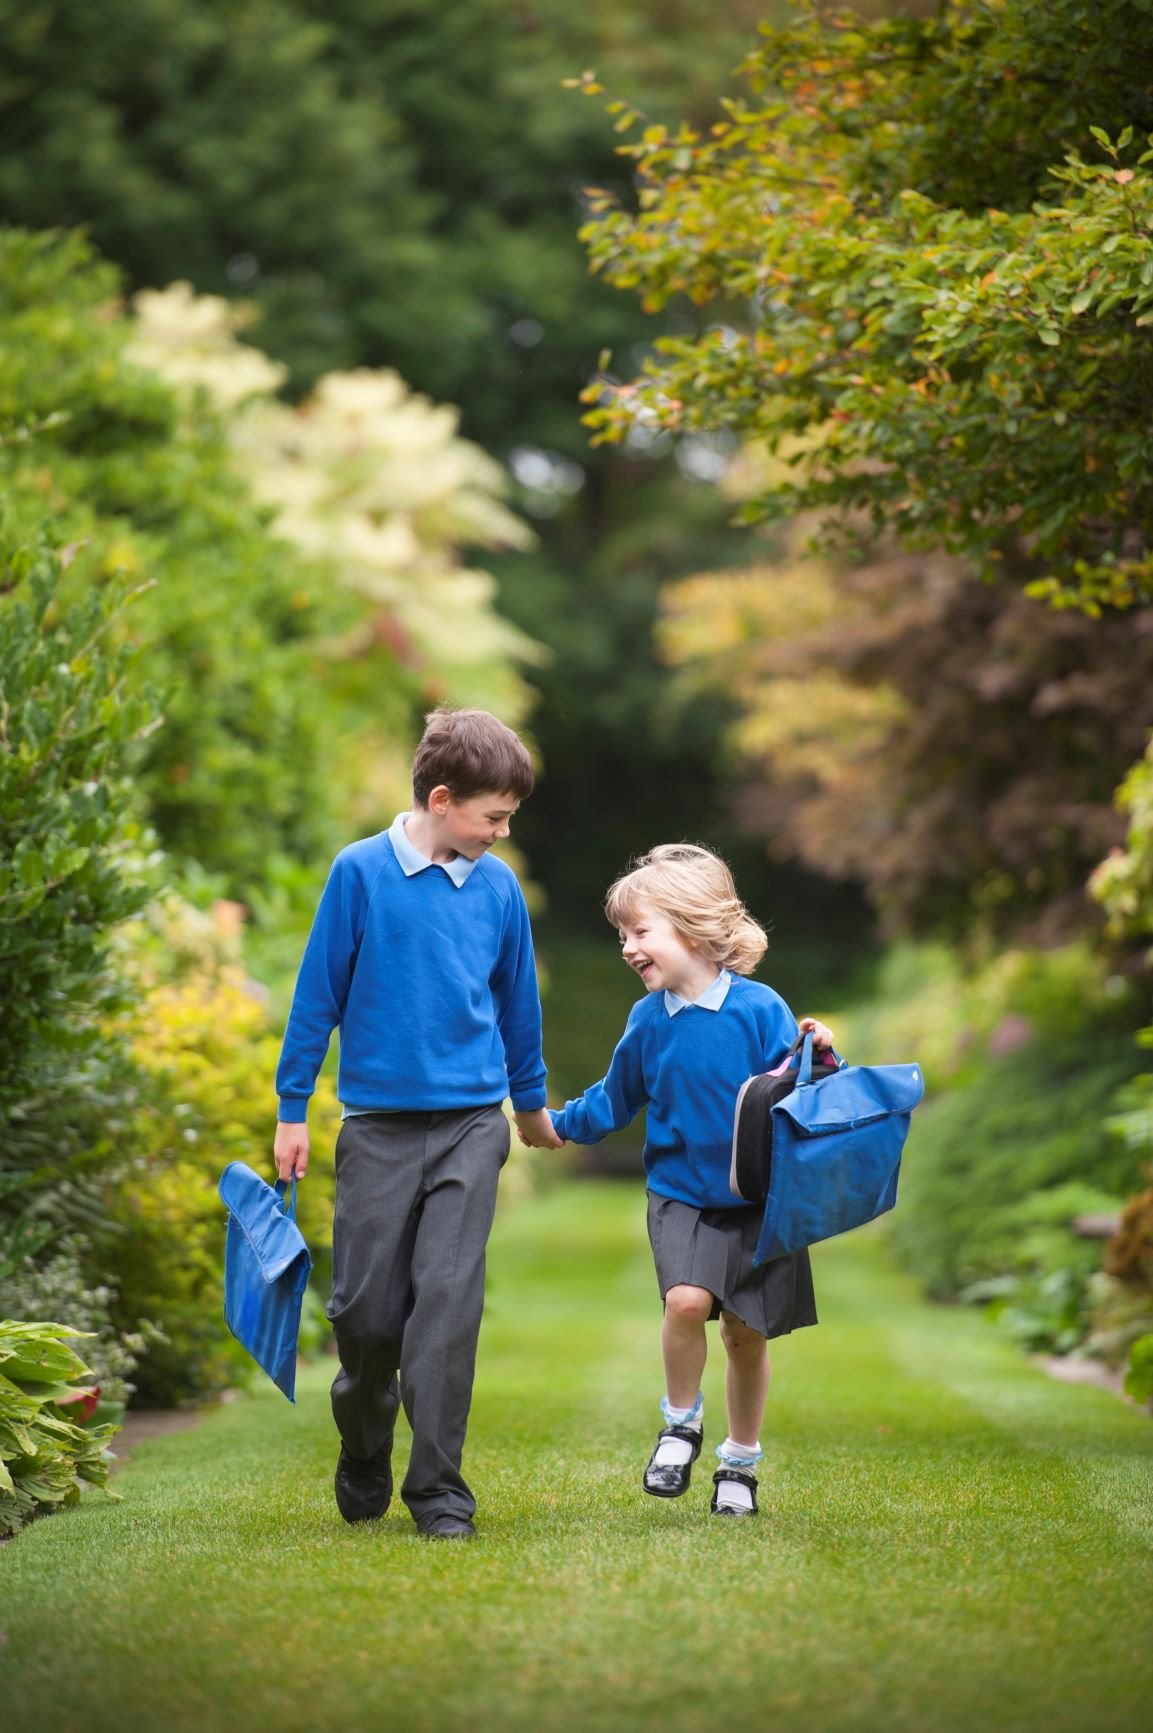
6. Get baby photos with the siblings

Baby photos with their older brothers and sisters are always a family favourite. To achieve natural shots it’s best to give their siblings a role. For example, you could ask them to read to their baby brother or sister. If they are a little younger, ask them questions to get them involved, for example can you touch babies’ nose? This will result in more candid shots whilst keeping the older ones occupied and interested – win win!


7. Do your baby photoshoot in stages

Unlike when you hire a professional photographer, a baby photoshoot at home provides the gift of time. Instead of trying to pack all the shots in a couple of hours (between feeds and changing), you can choose to take a few shots at a time over the course of a few days.

This is where your preparation really comes into its own. Be sure to have your shortlist of favourite baby photoshoot ideas to hand so you can tick them off as you go!

There are so many milestones in your babies first twelve months, opting for a baby photoshoot at home allows you to capture your baby’s growth and adventures! Try taking a picture of your little one in the same location or with the same prop once a month. This makes perfect baby photo prints for a baby photo album, scrap book or to share with family and friends.


Baby photoshoot at home

8. Capture the tiny details

For guaranteed baby photos cute factor, be sure to capture the close-ups. Photos of their tiny toes, little fingers wrapped around one of yours and don’t forget those adorable baby rolls.


9. Showcase your baby photos

You’ve put all the tips into action and your baby photoshoot is complete, now it’s time to create treasured keepsakes! With PostSnap you can take your images from camera roll to real photo prints in a matter of minutes. Whether it’s prints for your baby photo album or photos to fill the frames on your gallery wall, we’re sure to have the baby photo format for you.

0 comment
0 FacebookTwitterGoogle +Pinterest
Example of what to write in a Christmas card, featuring photo Christmas cards

The sending and receiving of Christmas cards is an age-old tradition which dates back to 1843 and sitting down on a cosy evening to write your Christmas card messages is a special part of preparing for the holiday season. But when it comes to putting pen to paper, how often do you struggle to write season’s greetings for your friends and family? Our guide on what to write on a Christmas card, will provide all the inspiration you need to help you share more joy this holiday season.


Choosing your Christmas cards

We have many choices when it comes to how we wish to stay in touch with friends and family, but there is no better way to send holiday wishes than with a Christmas card.

Before you start writing your Christmas greetings, you need to select your chosen style of Christmas card. You could get crafty and create homemade Christmas cards, choose to make it extra meaningful and turn a photo into a Christmas card, or simply opt for a traditional shop bought Christmas card.


Ideas for what to write in a Christmas card

We’ve made composing a thoughtful message for your holiday card simple. We’ve categorised our ideas to ensure you have the right seasons greetings for each person on your list.


Simple Christmas card greetings

  • Merry Christmas. Wishing you all the best this holiday season.
  • Wishing you a Christmas that’s merry and bright!
  • Merry Christmas with lots of love.
  • I hope your Christmas is filled with joy and laughter.
  • Happy Holidays! I hope all of your Christmas wishes come true.
  • Best wishes for Happy Holidays and a wonderful New Year.
  • Wishing you a magical and blissful holiday.
  • Peace, joy, and love to you and your family


Photo Christmas Card For Partner

Christmas card messages for your partner

  • The only thing I love more than Christmas is you.
  • It’s not what’s under the tree that matters most, it’s who’s around it. Every year I’m so grateful to have you there.
  • All I want for Christmas is you.
  • I’m so lucky to be spending another Christmas with you!
  • Merry Christmas! You’re the best gift I could ask for.
  • Christmas is magical because we’re together.
  • The best gift of all is the gift of loving you. Merry Christmas.
  • Being with you has given me something to celebrate every day. Here’s to another Christmas with you.


Christmas Card For Nanny And Grandad

Christmas card sayings for your family

  • So glad we’re family…and so grateful for all the great Christmas memories we share.
  • For me, the holidays start when we get together.
  • There is no greater gift this festive season than spending time with family.
  • You’re all so important to us. Stay safe and stay happy this holiday season!
  • Having family like you is the best Christmas gift there ever could be.
  • Grateful to be blessed with such a wonderful family. Merry Christmas!
  • You can’t choose your family, but even if you could, I’d still choose you. Merry Christmas! Looking forward to spending some time with you.
  • I’m so thankful to have been blessed with such a wonderful family with which to celebrate this meaningful time of year.
  • It makes me so happy to remember all of our special memories from the past years.


Photo Christmas Card For Friends

What to write in a Christmas card to friends?

  • So grateful to have a friend like you at Christmas and all year long.
  • The warmest Christmas wishes from our home to yours.
  • This year I have been so grateful for your friendship—thank you for being such a wonderful part of my life.
  • Christmas is a good excuse to send cards to all my favourite people.
  • It’s friends like you that make this season so special and magical.
  • Holidays are so much more special when they are celebrated with important friends like you.
  • Wishing one of my most dearest and special friends a Merry Christmas and a happy New Year.
  • I hope your holiday season is as awesome as you are.


Photo Christmas Card

Christmas card messages for those who are far away

  • Missing you even more at this joyful time of year.
  • We may not be together in person this Christmas, but you’ll be in my thoughts and my heart.
  • Christmas won’t feel the same without you here. We wish you a wonderful holiday time.
  • Wish we could be together this holiday season, but since we can’t, I’m sending the warmest wishes your way.
  • Thinking of you with lots of love at Christmas.
  • We are not celebrating together this year, but my love and wishes will be with you always. Merry Christmas.
  • As we celebrate this Christmas in different places, we wish for good health and well-being for all of you. A very Merry Christmas to all of you.


Words to sign off your Christmas cards

  • Love,
  • With love,
  • Love always,
  • Much love to you,
  • Best wishes
  • Warmest wishes at Christmas and always,
  • Warmest wishes,
  • Christmas blessings,
  • Best wishes
  • All my love,
  • With all our love
  • Happy Holidays
  • Merry Christmas
  • Much Love
  • Hugs and kisses
  • All the best
  • Take care
  • Yours truly
  • Sincerely
  • Cheers
  • Lots of love
  • Your friend


One-of-a-kind words for one-of-a-kind photo Christmas cards

Meaningful Christmas greetings are even more meaningful when sent in personalised photo Christmas cards. If you want to send a card you can’t find in store, why not try an online greetings card maker. PostSnap’s greeting cards apps and online greetings card marker turn a photo into a Christmas card. Easy to use and available on Android and iOS. PostSnap photo Christmas cards are available as singles as well as in packs of 5 or 10.

0 comment
0 FacebookTwitterGoogle +Pinterest
How to write a postcard

Have you always wanted to send a postcard whilst on holiday but didn’t know how to write one? Well you’ve come to the right place, writing a postcard couldn’t be easier with our handy guide. 

Sending postcards to friends and family is a great way to show your loved ones just how much you care about them. Not only is it a sweet gesture but it is a fun way to share your adventures with your nearest and dearest. When it comes to how you’re going to send a postcard you have two options. You can either buy a postcard from a local shop or you can use your own photos to create your own unique photo postcard using an online postcard maker.


Postcard Format 


1. Choosing a postcard

One of the best things about sending a postcard is choosing the image on the front. This image will be the first thing your recipient sees so be sure to pick a postcard image that not only best represents your holiday but also an image you think your recipient would like best. 

Front Of Photo Postcard And Back Of Postcard With Message


2. Where to write on a postcard?

Greet your recipient on the back left hand side of a postcard but ensure you leave enough room below for a message. When writing postcards, the greeting is the perfect place to start off your message and make your recipient feel special and valued. If you’re aiming for a formal tone start your postcard with ‘Dear, (name)’. If you’re aiming for a more informal tone you could start your postcard with ‘Hello, Hi or Hey (name)’. 

Once you’ve chosen your postcard greetings, it’s now time to share holiday memories or your latest news with your recipient. Write your message on the back left hand side of the postcard just under the greeting. When it comes to writing a postcard the space is limited so your message needs to be short and sweet. Before putting pen to paper, plan what you are going to write to ensure you have enough space – there is nothing worse than running out of space in the middle of a sentence! If you’re stuck for ideas about what to write on a postcard, we run through 10 things to write on a postcard later on in this post.  

The next stage of postcard writing is signing off your postcard, so be sure to leave enough room as no postcard is complete without a heartfelt farewell to your loved ones. Choose to sign off your postcard with a ‘See you soon!, Wish you were here, Hugs from (destination)’ and be sure to include your name so your recipient knows who the postcard is from.

Back Of Postcard With Message


3. How to address a postcard

When it comes to addressing a postcard, write the recipient’s address on the right hand side. The standard postcard format has a vertical line down the middle, with a blank space to the left, and a lined space to the right. Write your recipient’s full name and address on the lined space to the right. Be sure to include the recipients full address including city/town, country and postcode.

Back Of PostCard with Postcard Address


4. Where to place a postcard stamp?

Place the stamp within the outlined box on the top right of the postcard (if purchasing a postcard from a local shop and not online). Whilst on holiday you can head to the post office, bank or petrol stations to purchase a stamp and if you’re wondering about postage rates, you can read our article, How much is a postcard stamp? Be sure that the stamp is only placed on the back of the postcard in the outlined box, anywhere else will increase the chances of the postcard getting lost.


What to write on a postcard – 10 ideas

Due to limited space on the back of a postcard it can often seem intimidating writing postcards.  Luckily, if you’re stuck for ideas, here are 10 things to write on a postcard:

  1. Share your favourite day of your trip – just come back from a boat cruise, city tour or water sports activity? Write a short description of your experience. 
  2. Say something personal – let your loved ones know how much you’re missing them. Beginning your postcard with a thought about the recipient will make them feel truly special. 
  3. Talk about the weather – has there been a day with especially interesting weather. Whether it rained, snowed or was a particularly beautiful day write a short summary to make your recipient feel closer to you.
  4. Share a local word or phrase with a translation – one of the best things about visiting a new country is getting to learn the basics of a new language so why not share your new favourite phrase. 
  5. Travel tips – what are the best must-sees around? Let your recipient know. 
  6. Fun fact about the location you’re visiting – have you learnt something interesting recently that your recipient would not know? 
  7. Explain the story behind your postcard photo – whether choosing a postcard locally or creating one online let your recipient know why the photo you’ve chosen best represents your trip. 
  8. Draw a picture that reflects your travels – don’t fancy writing, get artistic and draw a picture of your surroundings. 
  9. Share a new tradition that you’ve learned – have you attended a local festival and found a new tradition you think your recipient would love? 
  10. Write about the local food – just tried a local dish that you loved, describe the meal or even share the recipe.

Remember when writing a postcard the message on the back will be visible so be sure to not include any personal information. 

If you’re struggling to find a postcard in a local shop, why not try an online postcard maker. PostSnap’s postcard apps and online postcard maker turn your own photos into postcards in just a few minutes. PostSnap’s apps are easy to use and available on Android and iOS. PostSnap will print and mail 6 inch x 4 inch post cards worldwide from just £2.49 or $2.75 including postage.

0 comment
1 FacebookTwitterGoogle +Pinterest
How much is a postcard stamp? Postcard postage rates for UK, US and beyond

We often get asked how much are postcard stamps to and from popular destinations such as the UK, Australia and the US. Here is our guide to postcard postage rate.

UK postcard stamp price

Sending a postcard within the UK is good value using the Royal Mail. A standard A6 postcard is treated the same as a small letter and costs 76p for the 1st class service or if you choose 2nd class the postcard stamp cost is 65p.

In the UK, you can purchase postcard stamps at the Post Office or major supermarkets, such as Tesco, Sainsbury’s and Asda. Whether buying from the Post Office or a supermarket, the pricing generally stays the same.

UK Postcard Stamps


USPS postcard stamps

Sending a postcard within the US is an affordable way to communicate using the U.S Postal Service. A USPS postcard stamp costs just $0.35.

US Postcard Stamp 

Postcard stamp price when sending overseas

If you are sending postcards abroad, the postcard stamps price can increase substantially.

Below you will find the postcard stamp cost for the UK, US and Australia, whether your card is being sent domestically, or internationally.


Postage rates for postcards, showing domestic and international postcard postage.

The postcard stamp rate is based on a standard A6 postcard size. Prices are correct as of 7th October.

PostSnap postcard stamp cost

We often get asked, how much does it cost to send a postcard with PostSnap? The good news is, UK postage is included as standard. Whether you are sending the postcard from the UK or abroad, as long as it is going to a UK address, the cost of the postcard stamp is covered for free.  Sending a little further afield, international postage prices are never more than £0.50 or $0.50.

Sending a personalised photo postcard straight from your phone also removes the hassle of spending any of your precious holiday time in post office queues.

0 comment
1 FacebookTwitterGoogle +Pinterest
Newer Posts